
Self-Hosted Password Managers: Why You Need One and How to Get Started
Learn why you need a self-hosted password manager for your homelab and how to set up Vaultwarden with Docker in 30 minutes. Step-by-step guide.
Author
David Okonkwo
Key Takeaways
- A self-hosted password manager gives you full control over your credentials - no third party stores your data
- Vaultwarden is the best self-hosted option for most homelabbers - it is lightweight, fully compatible with Bitwarden clients, and runs on almost anything
- You can set up a working self-hosted password manager in under 30 minutes using Docker Compose
- Always back up your password vault - losing access to your vault means losing access to every account
- Start with Vaultwarden, then explore tools like KeePassXC or Authentik as your needs grow
If you have ever looked at your browser's saved passwords list and thought "this feels like putting all my eggs in one basket," you are not alone. Most people rely on cloud-based password managers like 1Password, Dashlane, or even their browser's built-in autofill. These tools work well - until you realize that a company you have never met holds the keys to every account you own.
The good news is you do not have to trust anyone else with your passwords. A self-hosted password manager runs on hardware you control - a mini PC in your closet, a Raspberry Pi on your desk, or a virtual machine on your homelab server. You own the data. You decide who accesses it. And you can back it up however you like.
If you have ever felt overwhelmed by the idea of self-hosting something as critical as your passwords, this guide is for you. We will walk through what a self-hosted password manager actually is, why it matters, and exactly how to set one up - step by step. No prior Linux experience required.
What Is a Self-Hosted Password Manager?
Think of a password manager like a digital safe. You put all your passwords into it, and the safe keeps them locked with a single master password. Every time you need to log into a website, you open the safe, grab the password, and use it.
A cloud-based password manager stores that safe on someone else's servers - 1Password, LastPass, or Bitwarden's cloud. You trust them to keep it secure.
A self-hosted password manager stores that safe on your hardware. The safe is still encrypted the same way, but the physical server sitting in your home. Nobody else can access it unless you let them.
Here is what this means in practical terms:
- Your data never leaves your network. The encrypted vault sits on your server, behind your firewall.
- No monthly subscription fees. Most self-hosted password managers are free and open source.
- You control the backup strategy. Copy your vault to a USB drive, a NAS, or a cloud storage bucket - your choice.
- No vendor lock-in. If a cloud service shuts down, you lose access. If your server dies but you have backups, you just restore.
The trade-off is responsibility. You are now the sysadmin of your own password vault. If your server goes down and you have no backups, you could lose access to everything. That sounds scary, but the setup is simpler than you might think - and we will cover backup strategies later in this article.
Why Homelabbers Should Care About Self-Hosted Passwords
You are already running services on your homelab - maybe Docker containers, maybe a Proxmox VM, maybe a TrueNAS box. You have probably spent hours getting your network just right, configuring firewall rules, setting up VPNs for remote access.
But here is the thing nobody tells you: all of that security work is undermined if your passwords are weak or stored insecurely.
Consider this:
- You have a firewall blocking unauthorized access to your homelab - but your admin password is
admin123 - You have a VPN for remote access - but the VPN credentials are saved in your browser's plaintext password store
- You have Docker containers running critical services - but each container has its own database password written in a
docker-compose.ymlfile with no encryption
A self-hosted password manager solves all of these problems in one tool:
- Strong, unique passwords for every service - the manager generates and remembers them
- Encrypted storage for sensitive credentials like API keys, SSH keys, and database passwords
- Secure sharing with family members or team members who need access to certain accounts
- Emergency access - designate a trusted person who can request access to your vault if something happens to you
If you are building a homelab for privacy and digital sovereignty - which is why most of us started this journey - then using a cloud-based password manager is a contradiction. You are trusting one company with your most sensitive data while trying to minimize your dependence on other companies.
Vaultwarden: The Best Starting Point
There are several self-hosted password managers available, but for most homelabbers, Vaultwarden is the clear winner. Here is why.
Vaultwarden is a lightweight, unofficial reimplementation of the Bitwarden server. It uses the same encryption standards as Bitwarden and is fully compatible with all official Bitwarden clients - the browser extension, desktop app, mobile apps, and web vault. The difference is that instead of connecting to Bitwarden's cloud servers, you point the clients at your own Vaultwarden server.
What makes Vaultwarden special:
- Tiny resource footprint. It runs in a Docker container that uses roughly 30MB of RAM. You can run it on a Raspberry Pi without breaking a sweat.
- Full Bitwarden compatibility. All the apps, browser extensions, and features work exactly the same.
- Admin panel included. A web-based dashboard lets you manage users, view server health, and configure settings.
- Built-in 2FA support. TOTP (time-based one-time passwords) built right in - no separate authenticator app needed.
- Active community. Thousands of homelabbers run Vaultwarden, so finding help is easy.
Other options exist - KeePassXC for offline-first, Authentik for identity management, Passbolt for teams - but Vaultwarden hits the sweet spot of ease-of-use, features, and reliability for getting started.
What You Will Need
Before we start, here is what you need:
- A machine running Linux (Ubuntu, Debian, or any distribution that supports Docker)
- Docker and Docker Compose installed
- A domain name pointing to your server (optional but recommended for remote access)
- About 30 minutes of your time
If you do not have a dedicated server for this, a mini PC works perfectly. Something like a Beelink SER5 with a Ryzen processor handles Vaultwarden and dozens of other services simultaneously.
Choosing the Right Hardware
You do not need powerful hardware for Vaultwarden. The server uses roughly 30MB of RAM and minimal CPU. Here is what works:
- Raspberry Pi 4 or 5 - the cheapest option, runs Vaultwarden perfectly. Add a small SSD for reliable storage instead of running from an SD card.
- Mini PC - a Beelink or Minisforum mini PC gives you room to grow. You can run Vaultwarden alongside Jellyfin, Nextcloud, and other services.
- Existing server - if you already run Proxmox or have a TrueNAS box, create a small VM or container for Vaultwarden.
The key requirement is reliability. Your password manager needs to be available when you need it. This is why a UPS is recommended - even a small one keeps your server running long enough to shut down gracefully during a power outage.
 alt="Beelink SER5 MAX Mini PC"
You will also want a UPS to keep your server running during power outages. If your Vaultwarden server goes down, you lose access to your passwords until it comes back online.
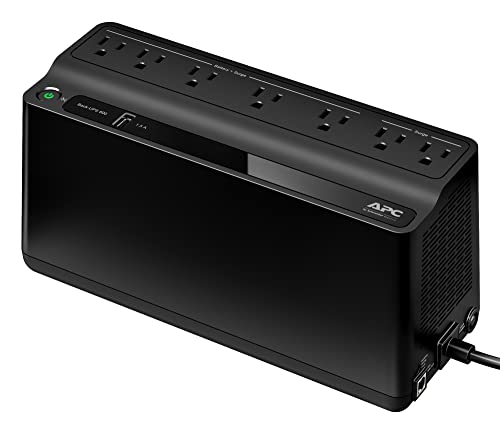 alt="APC BE600M1 UPS"
Step 1 - Install Docker and Docker Compose
If Docker is not already installed on your server, here is how to get it running on Ubuntu or Debian. If you already have Docker, skip to Step 2.
# Update your package index
sudo apt update && sudo apt upgrade -y

# Install Docker using the official convenience script
curl -fsSL https://get.docker.com -o get-docker.sh
sudo sh get-docker.sh

# Add your user to the docker group (so you do not need sudo for docker commands)
sudo usermod -aG docker $USER

# Log out and back in for the group change to take effect
# Then verify Docker is working
docker --version
docker compose version
That is it. Docker is ready. If you ran into issues, the official Docker documentation has detailed troubleshooting steps.
Step 2 - Create the Vaultwarden Docker Compose File
Now we will set up Vaultwarden using Docker Compose. This is a single file that tells Docker everything it needs to know about running Vaultwarden.
Create a directory for your Vaultwarden installation and a docker-compose.yml file inside it:
# Create the directory structure
mkdir -p /opt/vaultwarden/data
cd /opt/vaultwarden

# Create the docker-compose.yml file
cat > docker-compose.yml << 'EOF'
services:
  vaultwarden:
    container_name: vaultwarden
    image: vaultwarden/server:latest
    restart: unless-stopped
    environment:
      # Replace with your domain (or use IP for local-only access)
      DOMAIN: "https://vault.yourdomain.com"

      # Signups disabled by default - only you create accounts
      SIGNUPS_ALLOWED: "false"

      # Admin panel (disable after initial setup if you prefer)
      ADMIN_TOKEN: "GENERATE_A_TOKEN_HERE"

      # WebSocket support for real-time sync
      WEBSOCKET_ENABLED: "true"

      # Uncomment to enable email verification for new logins
      # SMTP_HOST: "smtp.youremail.com"
      # SMTP_PORT: "587"
      # SMTP_FROM: "vaultwarden@yourdomain.com"
      # SMTP_USERNAME: "your-email"
      # SMTP_PASSWORD: "your-password"

      # Uncomment to enable push notifications for mobile
      # PUSH_ENABLED: "true"
      # PUSH_INSTALLATION_ID: "your-guid-here"
      # PUSH_INSTALLATION_KEY: "your-key-here"
    volumes:
      - ./data:/data
    ports:
      - "8080:80"
      - "3012:3012"
EOF
Before you start Vaultwarden, you need to generate an admin token. This token protects the admin panel - without it, anyone could access your server's admin interface.
# Generate a secure admin token
openssl rand -base64 48
Copy the output and replace GENERATE_A_TOKEN_HERE in your docker-compose.yml file with the generated token. Save this token somewhere safe - you will need it to access the admin panel.
You should also set the DOMAIN to your actual domain. If you are only accessing Vaultwarden locally (no remote access needed yet), you can use http://192.168.1.100:8080 where 192.168.1.100 is your server's local IP address.
Step 3 - Start Vaultwarden
With the configuration file ready, start Vaultwarden:
cd /opt/vaultwarden
docker compose up -d
Docker will pull the Vaultwarden image (about 50MB) and start the container. Once it is running, verify it is healthy:
# Check that the container is running
docker compose ps

# View the logs to confirm everything started correctly
docker compose logs vaultwarden | tail -20
You should see something like [INFO] Starting Rocket on 0.0.0.0:80. If you see errors, check that your docker-compose.yml has no syntax issues and that the ports 8080 and 3012 are not already in use by another service.
Open your browser and navigate to http://your-server-ip:8080. You will see the Vaultwarden web interface. This is your password vault - running on your hardware, accessible only on your network.
Step 4 - Create Your First Account
When you first access the Vaultwarden web vault, you need to create an account. Remember that we set SIGNUPS_ALLOWED: "false" - this means nobody can register an account except through the admin panel.
To create your first account:
- Click "Create Account" on the web vault
- Enter your email address and a strong master password
- Confirm the account
- Open a new tab and go to
http://your-server-ip:8080/admin - Log in with your email and the admin token you generated earlier
- Find your pending account request and approve it
Once approved, go back to the web vault and log in with your email and master password. You are in.
Critical advice about your master password: This is the one password you absolutely must remember. Write it down on paper and store it somewhere physically secure - a locked drawer, a safe, a safety deposit box. Do not store it digitally. If you forget your master password and have no recovery method, your vault is gone.Here is what is actually happening under the hood: your master password is used to derive an encryption key. All your vault data is encrypted with that key on the client side before it ever reaches the server. The server only stores encrypted blobs - it never sees your actual passwords. Even if someone hacked your server and downloaded the entire database, they would need your master password to decrypt anything.
Step 5 - Install the Bitwarden Clients
Now that your Vaultwarden server is running, you need the client apps to actually use it. Because Vaultwarden is compatible with Bitwarden's protocol, you install the official Bitwarden clients and point them at your server.
Browser Extension
Install the Bitwarden browser extension for Chrome, Firefox, or Edge from the official Bitwarden website. After installation:
- Click the Bitwarden icon in your browser toolbar
- Click the settings gear icon
- Find the "Server" field and change it from
bitwarden.comtohttps://vault.yourdomain.com(or your server URL) - Log in with your email and master password
The extension will now save and autofill passwords using your self-hosted vault.
Desktop Apps
Bitwarden has desktop apps for Windows, macOS, and Linux. Download them from the same page. The setup is the same - change the server URL in settings and log in.
Mobile Apps
The Bitwarden mobile apps for iOS and Android work the same way. Install from the App Store or Google Play, change the server URL in settings, and log in.
After connecting all your devices, test that password sync works:
- Add a new login in the browser extension
- Open the mobile app and verify the new login appears
- If sync works, you are fully set up
Step 6 - Configure Automatic Backups
This is the most important step. Your password vault is only as reliable as your backup strategy.
Here is a simple backup script that copies your Vaultwarden data directory to a timestamped archive:
#!/bin/bash
# /opt/vaultwarden/backup.sh
# Run daily via cron: 0 2 * * * /opt/vaultwarden/backup.sh

BACKUP_DIR="/opt/vaultwarden/backups"
DATE=$(date +%Y-%m-%d_%H-%M)
KEEP_DAYS=30

# Create backup directory if it does not exist
mkdir -p "$BACKUP_DIR"

# Stop Vaultwarden briefly to ensure a consistent backup
cd /opt/vaultwarden
docker compose stop vaultwarden

# Create a compressed backup
tar -czf "$BACKUP_DIR/vaultwarden-$DATE.tar.gz" data/

# Restart Vaultwarden
docker compose start vaultwarden

# Delete backups older than KEEP_DAYS
find "$BACKUP_DIR" -name "vaultwarden-*.tar.gz" -mtime +$KEEP_DAYS -delete

echo "Backup completed: vaultwarden-$DATE.tar.gz"
Make the script executable and set up a cron job to run it daily:
chmod +x /opt/vaultwarden/backup.sh

# Add to crontab (runs at 2 AM daily)
crontab -e
# Add this line:
# 0 2 * * * /opt/vaultwarden/backup.sh >> /var/log/vaultwarden-backup.log 2>&1
Step 7 - Set Up HTTPS with a Reverse Proxy
Your Vaultwarden installation is currently running over plain HTTP. For any real use - especially accessing it from outside your home network - you need HTTPS.
The easiest approach is to use a reverse proxy like Caddy, which automatically provisions free TLS certificates from Let's Encrypt. We have a detailed guide on reverse proxy options for homelabs if you want to compare options.
Here is a minimal Caddy configuration for Vaultwarden:
# Caddyfile
vault.yourdomain.com {
    reverse_proxy vaultwarden:80
}
Add Caddy to your docker-compose.yml:
services:
  caddy:
    image: caddy:latest
    restart: unless-stopped
    ports:
      - "80:80"
      - "443:443"
    volumes:
      - ./Caddyfile:/etc/caddy/Caddyfile
      - caddy_data:/data
    depends_on:
      - vaultwarden

volumes:
  caddy_data:
Make sure your domain's DNS points to your server's public IP address, and Caddy will handle the rest - automatic certificate provisioning, renewal, and HTTPS redirect.
Common Mistakes to Avoid
Mistake 1 - Skipping Backups
The number one mistake people make is setting up Vaultwarden and never configuring backups. Your passwords are only as safe as your ability to restore them. Set up the backup script above before you do anything else.
Mistake 2 - Using a Weak Master Password
Your master password should be at least 16 characters long, using a mix of words, numbers, and symbols. A passphrase like correct-horse-battery-staple-thunder-42 is both strong and memorable. Never use a short password like P@ssw0rd123.
Mistake 3 - Exposing the Admin Panel to the Internet
Never expose port 8080 (the admin panel) to the public internet without strong authentication. If you need remote admin access, use a VPN first, then access the admin panel over your local network.
Mistake 4 - Not Testing Recovery
Create a test account with dummy passwords, back up the data directory, delete the container, restore from backup, and verify the test account still works. This takes 15 minutes and could save you from disaster.
Mistake 5 - Running Without TLS
Plain HTTP sends your master password in plaintext over the network. Always use HTTPS, even on your local network. It is easy to set up with Caddy and costs nothing.
Monitoring Your Vaultwarden Server
After your password manager is running, you will want to keep an eye on it. Here are a few simple things to check periodically:
Check Container Health
Run docker compose ps regularly to make sure the Vaultwarden container is still running. If it shows as "restarting" or "exited," check the logs with docker compose logs vaultwarden to see what went wrong.
Monitor Disk Space
Your vault database grows over time as you add more passwords. Check disk space with df -h and make sure your data directory has room to grow. A typical vault with hundreds of entries is still very small - usually under 10MB - but backups can add up if you keep many archived copies.
Set Up Uptime Monitoring
If you run a monitoring stack like Prometheus and Grafana, add a simple HTTP health check for your Vaultwarden instance. The endpoint at http://your-server:808/alive returns a 200 status when the server is healthy. You can also use a free service like Uptime Robot to ping your vault from outside your network.
Review Access Logs
Vaultwarden logs authentication attempts to its container logs. Periodically review these for suspicious activity - repeated failed login attempts could indicate someone is trying to guess your master password.
Taking It Further
Once your self-hosted password manager is running, here are some next steps to consider:
Enable Two-Factor Authentication
Vaultwarden has built-in TOTP (time-based one-time password) support. Enable it in your account settings for an extra layer of security. Even if someone obtains your master password, they cannot log in without the 2FA code.
Integrate with SSH Keys
Store your SSH private keys in the vault and use the Bitwarden SSH agent to manage them. This eliminates the need to keep SSH keys as files on disk.
Set Up Emergency Access
Vaultwarden lets you designate trusted contacts who can request access to your vault in an emergency. Configure this in your account settings - it is especially important if you are the only person who knows your master password.
Explore Related Security Tools
Now that you have a password manager, consider adding these to your homelab security stack:
- Fail2ban - automatically blocks brute-force login attempts
- Authelia - single sign-on and two-factor authentication for all your services
- Pi-hole or AdGuard Home - network-wide ad blocking that also protects against malicious domains
If you want to learn more about securing your homelab overall, check out our homelab security best practices guide for a complete checklist.
Frequently Asked Questions
How is Vaultwarden different from Bitwarden?
Bitwarden is the official cloud-based password manager service. Vaultwarden is an independent, community-maintained server implementation that is fully compatible with Bitwarden's client apps. Vaultwarden runs on your own hardware, while Bitwarden runs on their servers. The encryption and security model are identical.
Can I use Vaultwarden if I do not have a domain name?
Yes. You can access Vaultwarden directly via your server's IP address on your local network (for example, http://192.168.1.100:8080). A domain name is only needed if you want to access it from outside your home network with HTTPS.
What happens if my Vaultwarden server goes down?
You temporarily lose access to your passwords until the server comes back online. This is why backups are critical - you can restore your vault to a new server. Many people also keep an offline backup of their vault export as a safety net.
Is Vaultwarden as secure as 1Password or LastPass?
Vaultwarden uses the same encryption standards (AES-256-CBC with PBKDF2-SHA256 or Argon2) as Bitwarden. The security of your vault depends on your master password strength and your server security - not on which company runs the backend.
Can multiple people use the same Vaultwarden server?
Yes. Vaultwarden supports multiple user accounts and organizations. Each user has their own encrypted vault, and you can share specific items between users. This makes it suitable for families or small teams.
What to Learn Next
You have just set up one of the most important security tools for your homelab. Here is what to explore next:
- Docker for homelabs - if you are new to Docker, this guide covers the concepts you need
- Homelab networking basics - understand how to set up your network for secure remote access
- What to self-host first - discover other essential services to run on your homelab
- Homelab security best practices - complete security checklist for your setup
The good news is that a self-hosted password manager is one of those rare homelab projects that immediately makes your entire setup more secure. Every other service you run will benefit from the strong, unique passwords that your new vault generates. One step at a time - and you have just taken a big one.