

If you want a homelab that lasts, you need two boring systems: backups and monitoring.
Without them, every update feels risky, every disk makes you nervous, and you only find problems after something is down. With them, you can experiment, break things, and recover like it’s normal.
In this post:
- A practical homelab backups plan (without enterprise tools)
- What monitoring matters first (and what you can ignore)
- A weekly maintenance checklist that prevents slow chaos
If you are following the beginner series, this builds on earlier foundations in the Self-Hosting category.
Homelab backups: the 3-2-1 rule in plain language
Homelab backups are not the same as RAID.
RAID can help you survive a disk failure. Homelab backups help you survive mistakes, corruption, ransomware on a client device, and “oops I deleted the folder.”
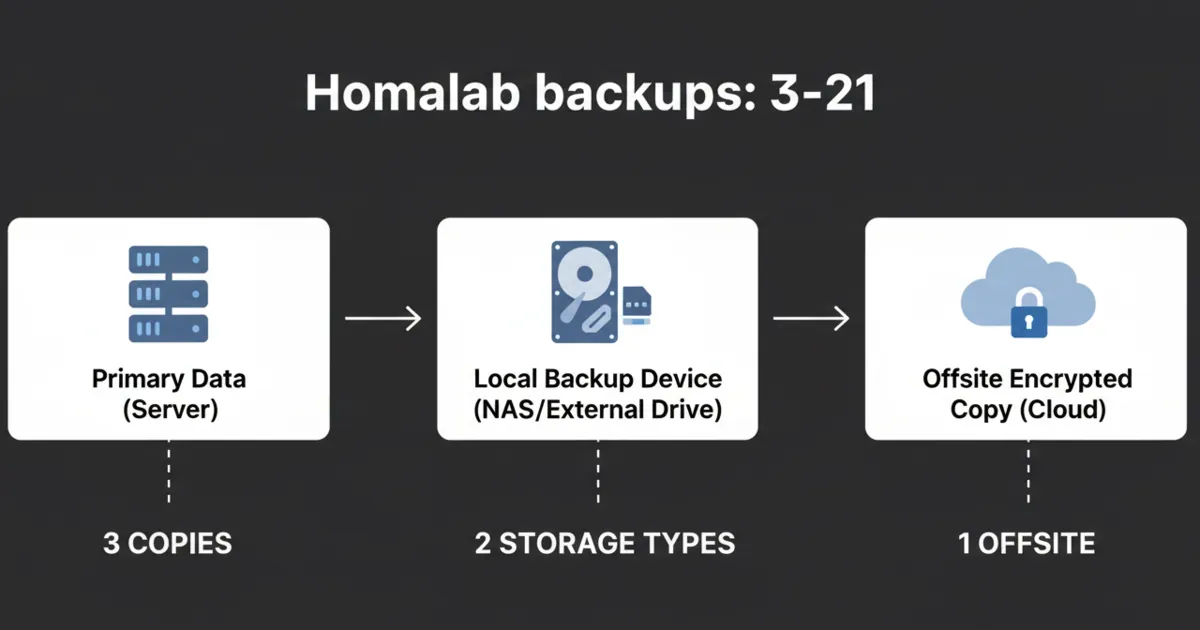
A simple mental model is the 3-2-1 rule:
- 3 copies of your data
- 2 different types of storage
- 1 copy offsite
You do not need perfection on day one. You need progression.
References:
- Restic: https://restic.net/
- BorgBackup: https://www.borgbackup.org/
Step 1: decide what you are actually backing up
Beginners back up the wrong thing because they back up “servers” instead of “state.”
For most homelabs, the things that matter are:
- application data (databases, uploads, media metadata)
- configuration (compose files, environment variables, reverse proxy configs)
- credentials and secrets (stored safely)
A good rule for homelab backups:
- If you cannot rebuild it quickly from documentation, it belongs in the backup.
It also helps to rank your data into three buckets:
- Tier 1 (painful to lose): photos, documents, password vault exports, personal notes
- Tier 2 (annoying to lose): app databases, media server metadata, dashboards, configs
- Tier 3 (easy to rebuild): the OS install itself, base packages, container images
That tiering is how you decide backup frequency and how hard you go on offsite.
Step 2: store data in obvious places
The easiest way to fail at homelab backups is to let data sprawl.
If you use containers, your goal is simple:
- configs in a folder you can see
- data in named volumes or clear host paths
That makes it possible to back up without guessing.
Step 3: pick a backup tool and make it automatic
The best backup tool is the one you will actually run.
A solid beginner approach is a tool that:
- encrypts by default
- supports multiple destinations
- can verify backups
- supports retention (so you can keep older snapshots)
Restic is popular because it is a single binary, supports many backends, and uses encryption.
BorgBackup is also common in homelabs, especially when backing up to another Linux box or a NAS.
The tool choice matters less than two habits:
- schedule backups automatically
- monitor that they succeed
If your backups require you to remember to run a command, they will eventually stop.
Step 4: pick two destinations (local + offsite)
A beginner-friendly path:
- Local backup to a second disk or NAS share
- Offsite backup to a cloud bucket or a second location
Offsite matters because ransomware, theft, and “the whole box died” events do not care that you had two local disks.
Step 5: test restores (or it is not a backup)
The simplest restore test is boring and small:
- restore one folder
- restore one database dump
- restore one service config
If you can do that, you can do bigger restores later.
A realistic restore test loop for homelab backups:
- Pick one app (for example, your dashboard or a notes service).
- Restore its config folder to a temporary location.
- Restore its data volume to a temporary location.
- Start the app with the restored paths and confirm it works.
The moment you do this once, backups stop being abstract.
VM backups vs container backups (what most beginners get wrong)
If you run a hypervisor, it is tempting to say, “I’ll just back up the VM.”
That can work, but it hides two problems:
- big backups take longer, so you do them less
- restores become all-or-nothing
A more flexible approach:
- Back up app data and config frequently.
- Back up the VM snapshot/export less frequently, as a convenience.
For containers, the rule is the same:
- treat containers as replaceable
- treat volumes and configs as the thing you protect
This mindset is the difference between homelab backups that actually save you and homelab backups that only look good in a folder.
What to monitor first (so alerts are useful)
Monitoring is not dashboards. Monitoring is knowing when something is broken.
Start with checks that answer:
- Is the service up?
- Is the disk filling up?
- Is the host running out of memory?
- Are backups succeeding?
References:
- Uptime Kuma: https://uptime.kuma.pet/
- Prometheus: https://prometheus.io/
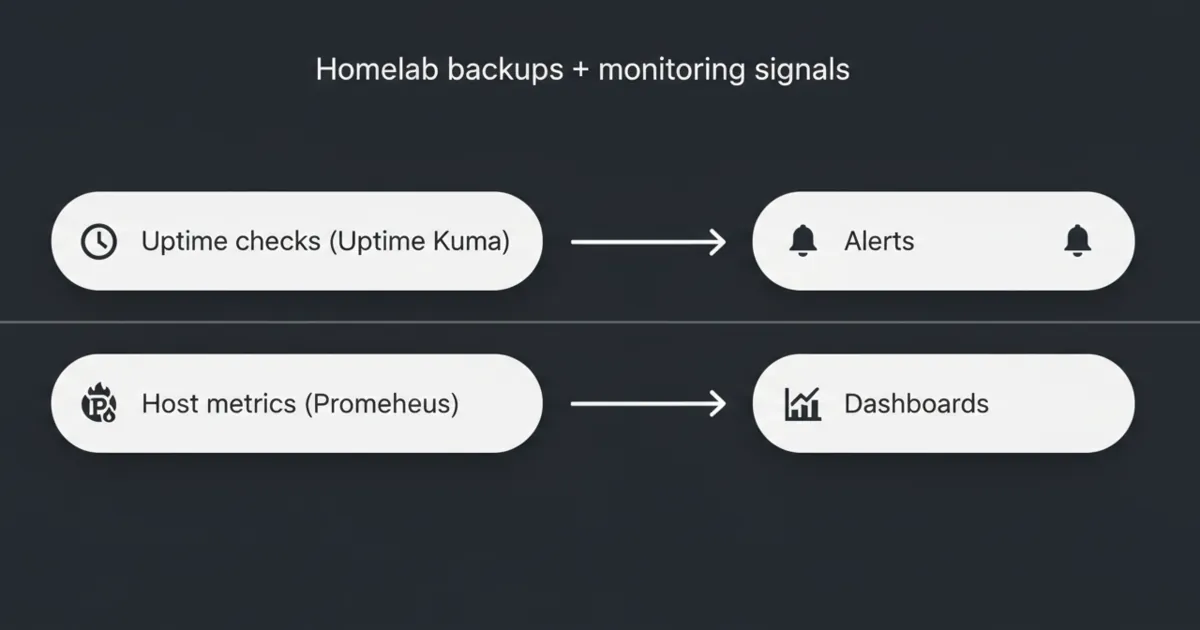
1) Uptime checks (the fast win)
Uptime checks are the easiest start. They tell you if a service is reachable.
Uptime Kuma is popular because it is simple, self-hosted, and gives you alerts without a full metrics stack.
A practical trick:
- use a separate monitor type for “public endpoint” vs “LAN-only endpoint” so you do not confuse WAN outages with app outages.
2) Disk space alerts (the silent killer)
A shocking number of homelab outages are just: disk full.
Set alerts for:
- root filesystem usage
- your app data volume usage
- your backup destination usage
If you only set one threshold, set it early. Running out of disk is rarely a sudden event.
3) Resource sanity checks (CPU, RAM, temperatures)
You do not need a perfect graph. You need a warning before the machine starts swapping itself to death.
Start with:
- high RAM usage alerts
- sustained CPU usage alerts (only if they cause real impact)
4) Backup success monitoring
The most dangerous failure mode is a backup job that has been failing for weeks.
You want an alert when:
- a backup did not run
- a backup ran but failed
- a repo verification fails
Even a simple “push” check from a backup script to an uptime monitor is a major upgrade.
5) Exposure monitoring (the security-adjacent win)
At least monthly, check:
- which services you intentionally exposed
- which ports are forwarded
This is not “advanced security.” It is basic hygiene that protects your time.
A weekly maintenance routine that keeps your homelab stable
Most maintenance problems come from randomness.
A tiny routine prevents that:
Weekly (15–30 minutes)
- check uptime alerts
- check disk space
- confirm backups ran
- apply OS updates (or schedule them)
Monthly (30–60 minutes)
- update containers intentionally (not all at once)
- prune unused images and volumes carefully
- review what is exposed to the internet
Quarterly
- do a real restore test
- rotate passwords and keys you are worried about
The 5 mistakes that make homelabs fragile
Mistake 1: thinking RAID is a backup
It is not. It is availability.
Mistake 2: putting backups on the same machine only
A single event can take both prod and backups.
Mistake 3: having no restore notes
Write down restore steps. Future-you will thank you.
Mistake 4: alert fatigue
If you have 30 alerts, you have zero alerts.
Start with only the signals that predict downtime.
Mistake 5: updating everything at once
Batch updates. Keep a rollback plan.
FAQ
What should I back up first in a homelab?
Back up application data and configuration. If you can reinstall the OS, you usually do not need to back up the whole OS disk.
How often should homelab backups run?
Daily for important data is common. The right answer depends on how often your data changes and how much loss you can tolerate.
Do I need Prometheus and Grafana right away?
No. Start with uptime checks and disk space alerts. Add metrics when you have a specific question you want to answer.
How do I know my backups are actually working?
Do a restore test. The smallest successful restore is more valuable than a month of unchecked backup jobs.
What is a good simple maintenance schedule?
Weekly checks for uptime, disk space, and backups, plus a monthly update window, is enough for most small homelabs.
Next steps
Pick one service you care about. Today, do two things:
- set up a backup job for its data
- add an uptime check for it
If you can restore that service after a mistake, you have turned your homelab into a system you can trust.