
What Is a Homelab? (And Why You Probably Want One in 2026)
What is a homelab and why should you build one? Learn about homelab servers, purposes, uses, and beginner-friendly projects. Complete guide for 2026 with FAQs and practical advice.
Author
David Okonkwo

If you’ve ever wanted to try Linux, host your own services, or understand what your router is actually doing, you’ve already hit the same problem: you don’t want to break your main laptop or your home Wi‑Fi.
A home lab fixes that. It gives you a safe place to experiment, learn, and build genuinely useful stuff for your own life.
In this post you’ll walk away with:
- A clear definition of a homelab (in normal human language)
- Beginner-friendly projects you can do this week
- A realistic view of what you need and what it costs
- Safety basics so you don’t accidentally expose your network to the Internet
Related reading on HomelabAddiction:
- Start here: https://homelabaddiction.com/start-here/
- Homelab basics hub: https://homelabaddiction.com/homelab-basics/
- Guides: https://homelabaddiction.com/guides/
- Self-hosting: https://homelabaddiction.com/self-hosting/
- Tools we use: https://homelabaddiction.com/tools/
What a homelab is (and what it is not)
A home lab is a small setup where you run and test tech the way you would on “real” infrastructure — but at home, on your own terms.
A good mental model is: a practice range for computers and networks.
What it usually includes:
- One or more machines you can wipe/reinstall without stress
- A way to connect to your home network (Ethernet or Wi‑Fi)
- Software to run services, containers, or virtual machines
- Basic habits for backups and security
What it is *not*:
- A loud rack of enterprise servers (unless you want that life)
- A requirement to learn everything at once
- A single “correct” architecture
A beginner homelab succeeds when it is:
- Easy to reset when you mess up
- Cheap enough that you don’t feel guilty using it
- Separated enough that it doesn’t take down the household internet
Hidden-gem detail that saves pain: treat your lab as disposable. If every experiment creates a fragile snowflake server you’re afraid to reboot, you’ll stop learning.
What you can do with a homelab (beginner projects that actually matter)
You don’t need a grand plan. Pick one useful thing, ship it, then grow.
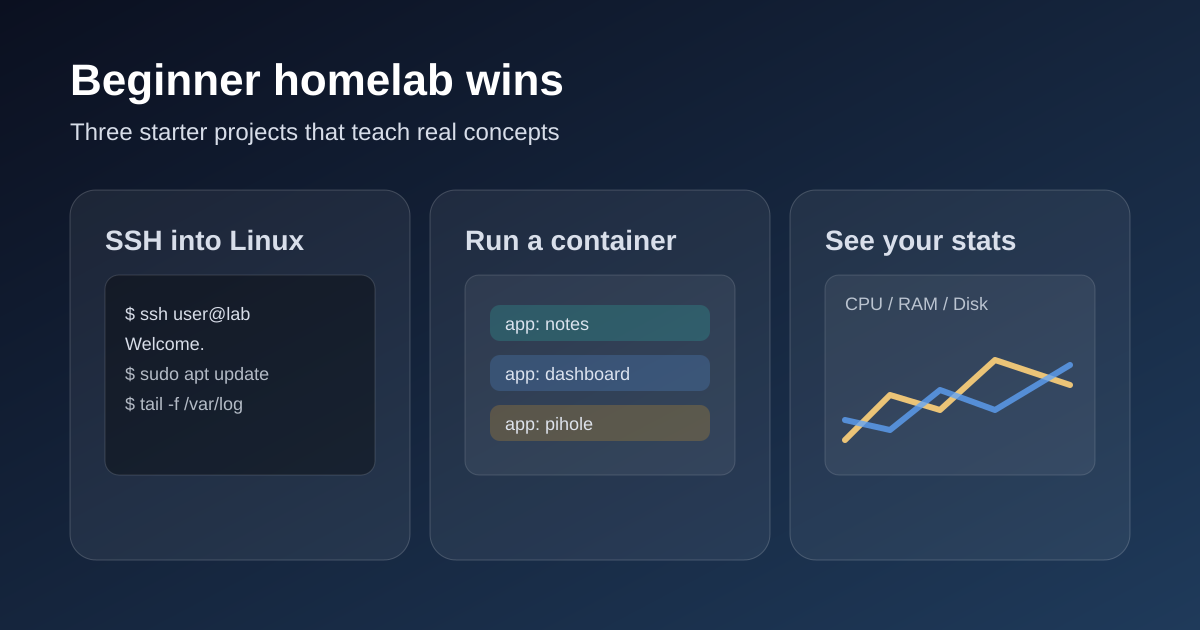
1) Learn Linux without fear
Set up a Linux server and get comfortable with:
- SSH (logging in remotely)
- Users, permissions, and updates
- Reading logs when something fails
2) Run a home dashboard and basic monitoring
Even a simple “is it up?” view teaches the right habit: observe systems, don’t guess.
3) Host a shared family file drop (carefully)
This teaches the core ideas behind NAS/home storage:
- Permissions and separate accounts
- Shared folders
- Backups that don’t depend on one laptop
Important note: a file server is not a backup. (We’ll hit backups again below.)
4) Block ads and junk at the network level
A classic first win is a DNS-based blocker (Pi-hole is the common entry point). It runs in one place and protects your whole network.
- Pi-hole: https://pi-hole.net/
5) Try containers for the first time
Containers are a clean way to run apps without “installing random stuff” all over your OS.
A beginner-friendly definition from Docker: containers are isolated processes you can build, ship, and run consistently across environments.
- What is a container? https://docs.docker.com/get-started/docker-concepts/the-basics/what-is-a-container/
6) Build a test “guest” network that’s isolated
If your router supports guest networks, that’s your first step toward safer experiments.
7) Practice backups and restores (the skill most people skip)
A simple rule beginners can apply immediately is 3‑2‑1 backups (three copies, two different media, one off-site).
- 3‑2‑1 explained: https://www.backblaze.com/blog/the-3-2-1-backup-strategy/
8) Learn what updates and patching really feel like
A homelab is where you learn “maintenance beats emergency repair.”
If you want a simple path: start with Linux + one service you personally want. Then add containers. Then add monitoring.
Core concepts you’ll hear a lot (quick, gentle explanations)
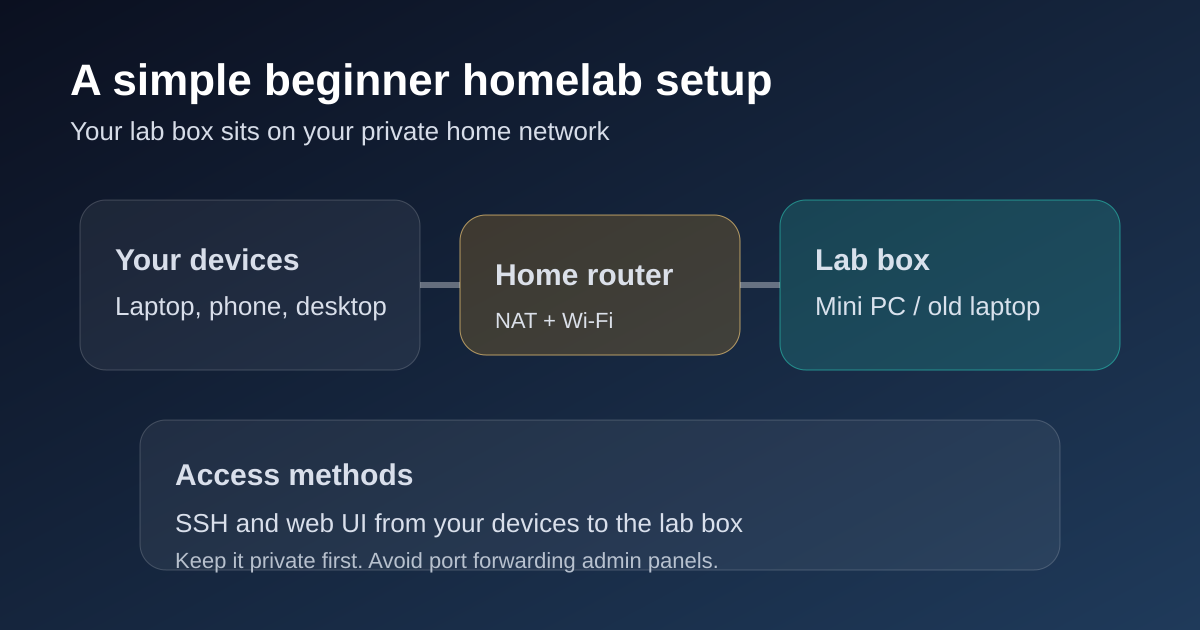
Private IPs and your home network
Most homelabs live on private IPs behind your router’s NAT. That’s why you can experiment without making things public.
- Private address ranges are defined in RFC1918: https://datatracker.ietf.org/doc/html/rfc1918
- A friendly summary (pfSense/Netgate docs): https://docs.netgate.com/pfsense/en/latest/network/addresses.html
VMs vs containers (60-second mental model)
- VMs: each workload gets a full OS (heavier, but very isolated).
- Containers: isolated processes sharing the host OS kernel (lighter, fast to deploy).
Docker’s docs explain this tradeoff clearly: https://docs.docker.com/get-started/docker-concepts/the-basics/what-is-a-container/
A “control panel” example: Proxmox
If you hear people say “run a hypervisor and create VMs,” Proxmox VE is a common homelab-friendly option because it manages both KVM virtual machines and LXC containers in one web UI.
- Proxmox VE overview: https://www.proxmox.com/en/products/proxmox-virtual-environment/overview
What you need to start (keep it simple)
You can start with surprisingly little. The goal is a stable “first box” you can experiment on.
Hardware (minimum viable lab)
- One machine: old desktop, used mini PC, old laptop, or a small server
- Storage: enough for your OS + whatever you want to test
- Networking: Ethernet if possible (removes a whole category of weirdness)
- Power + space: somewhere it can run quietly and safely
If you’re starting from zero, a quiet used mini PC is often the best beginner move.
Software (high level)
You have three common starting styles:
- Bare metal Linux + a couple services
- Linux + containers
- Virtualization (multiple VMs on one box)
For the deep “what specs matter and what to buy,” go next:
- Hardware basics: https://homelabaddiction.com/homelab-basics/
Realistic costs (budget tiers you can actually plan around)
Tier 1: “Use what you have”
Pros: free learning. Trade-off: older hardware can be noisy/power-hungry.
Tier 2: “Used mini PC” (best beginner balance)
Pros: quiet, low power, reliable. Trade-off: limited expansion.
Tier 3: “Purpose-built server” (only when you know what you need)
Pros: easier storage + virtualization growth. Trade-off: costs climb quickly.
Practical rule: don’t buy “future proof” hardware for a beginner lab. Buy for the next project you’ll do in the next 30–90 days.
Common beginner mistakes (and how to avoid them)
Mistake 1: Trying to do everything at once
Fix: pick one outcome and finish it, then add one concept at a time.
Mistake 2: No backups, then surprise data loss
Fix: use the 3‑2‑1 mindset early. (A second disk in the same machine is not a backup.)
Mistake 3: Building a “pet” server you’re afraid to touch
Fix: keep notes. A simple README per service is enough.
Mistake 4: Putting random services on your main network with no plan
Fix: start simple. Later, learn isolation and segmentation.
- Networking category: https://homelabaddiction.com/category/networking/
Mistake 5: Buying loud enterprise gear because it looks “real”
Fix: start quiet and efficient. Upgrade when you hit real limits.
Safety basics (seriously, read this)
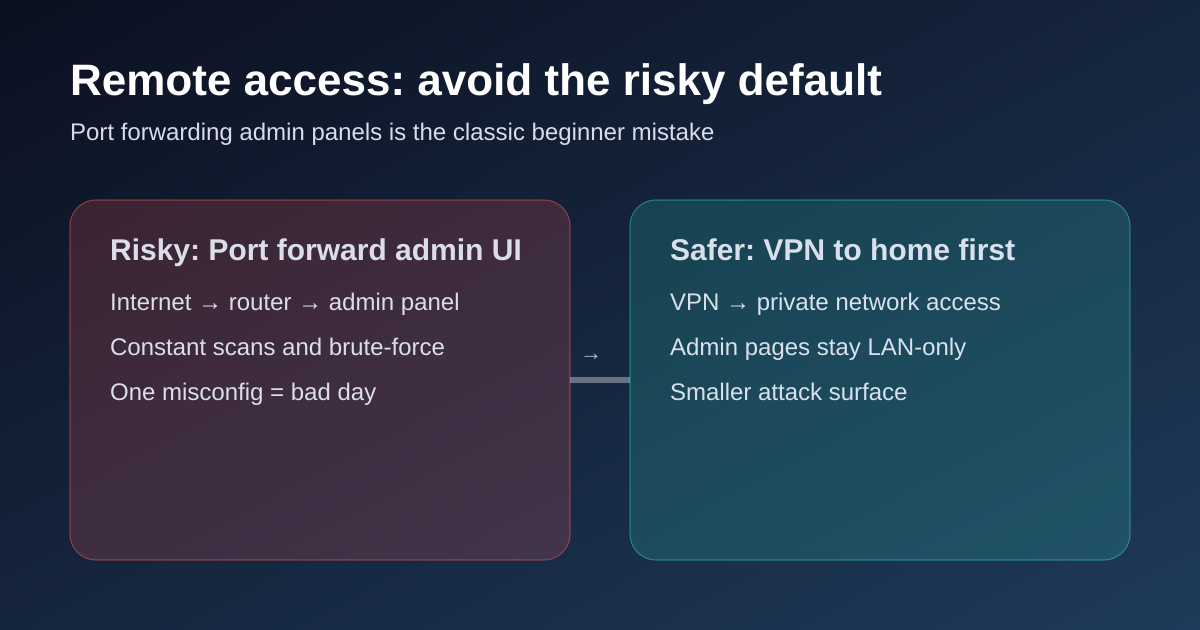
Do not expose admin panels to the Internet
Don’t port-forward your router to:
- NAS dashboards
- Hypervisor management pages
- Docker management UIs
- Anything with an admin login screen
If you need remote access, the safer pattern is:
- Use a VPN you control (then access services like you’re at home)
- Or use a secure tunnel with strong authentication
Keep the boring security basics boring
- Use strong unique passwords + a password manager
- Keep your install list small enough to maintain
- Update regularly
Two good “mindset” references:
- OWASP Top 10 (common web risks): https://owasp.org/www-project-top-ten/
- NIST Cybersecurity Framework (high-level approach): https://www.nist.gov/cyberframework
Next steps (and where to go next)
Your first action today:
- Pick a spare machine.
- Decide whether your first goal is “learn Linux” or “run one useful service.”
- Write what “done” means in one sentence.
Then continue here:
- Homelab basics: https://homelabaddiction.com/homelab-basics/
- Start here: https://homelabaddiction.com/start-here/
FAQ
Frequently Asked Questions About Homelabs
Do I need to know Linux to start a homelab?
No. A homelab is a great way to learn Linux because you can experiment without risking your daily computer. You can start with basic web interfaces and learn Linux commands as you go. A beginner-friendly OS like Ubuntu Server or a hypervisor like Proxmox gives you a web UI for most tasks, so you can ease into the command line at your own pace.
What is the best first project?
Pick one thing you will actually use. Popular first projects include setting up Pi-hole for network-wide ad blocking, running a personal media server with Jellyfin or Plex, hosting a family file share with Nextcloud, or learning Linux through SSH. The key is to finish one project before starting another. Finishing one project teaches more than starting five. Check our guide on what to self-host first for detailed recommendations.
What is the purpose of a homelab?
The purpose of a homelab is to give you a safe, isolated environment where you can learn, experiment, and build real IT infrastructure skills without risking your main computer or daily-use data. Think of it as a personal training ground for servers, networking, and software deployment. Beyond learning, homelabs serve practical purposes: hosting personal services like a media server with Jellyfin or Plex, running home automation, testing software before deploying it to production, and storing family data on your own terms instead of paying for cloud subscriptions.
What is a homelab server?
A homelab server is a dedicated machine, physical or virtual, that runs services inside your home lab. It can be an old desktop repurposed as a Linux server, a used mini PC, a Raspberry Pi, or even a virtual machine running on your main computer. The key difference from a regular computer is threefold: a homelab server is typically left running 24/7, it hosts multiple services using containers or virtual machines for isolation, and it is designed to be easily reset and reconfigured without affecting your daily-use devices.
What is the point of a homelab if I am not in IT?
Even if you are not in IT, a homelab has real practical benefits. You can host your own cloud storage instead of paying for Google Drive or Dropbox, run a network-wide ad blocker like Pi-hole, set up a personal media server with Jellyfin, Plex, or Emby, and learn skills that save money. Understanding networking helps you fix your own Wi-Fi issues and set up secure remote access without paying for expensive solutions.
What can I do with a homelab as a beginner?
Start with one project that solves a real need. Popular options include setting up Pi-hole, running a media server, hosting a file share with Nextcloud, learning Linux through SSH, or running Docker containers. Check our guide on what to self-host first and the reverse proxy comparison for more.